Sketch, Scroll, or Swipe?
How to choose the right prototyping method when field testing your global product
Bandwidth, community, and location are three factors your UX team should consider before creating a prototype to test in the field. On a research trip in India, a Google designer learned firsthand how these variables affect the way people respond to technology. In one instance, he shared his mobile phone with a local fruit vendor for feedback on a prototype, but instead of evaluating the design, the vendor was distracted by the phone’s bright contrast and uncracked screen. The context influenced the vendor’s response because he’d owned a second-hand phone with a broken screen for several years. Learning from this experience, the designer might instead begin by testing a paper prototype to help research participants focus on the design, rather than the device.
Product teams develop prototypes to test ideas and designs directly with users. In the beginning phase of product development, most designers create low-fidelity paper prototypes using sketch pads, sheets of plain paper, and markers. As teams gain confidence in their concepts, designers create and test high-fidelity digital mockups. This workflow is typical in many contexts, but there are special considerations if you’re building global products.
Before you begin building and testing prototypes, think about these factors:
- Location: Where are you testing your prototype?
- Bandwidth: Is internet access readily available?
- Community: How do people in this setting relate to technology?
Choosing the right prototyping method
Paper
Paper prototypes are hand-drawn models of user interfaces. They’re less detailed and more conceptual than digital prototypes. This method works especially well in the discovery phase of product development because paper prototypes facilitate rapid iteration and high-level feedback. When you’re working with paper prototypes, it’s easy to turn feedback into new iterations within a short time frame. The less detailed, conceptual designs typically give participants more space to interpret a prototype from their perspective. Paper prototypes may also help reduce positive feedback bias, which is when participants refrain from negative feedback in order to be polite.
People testing digital prototypes tend to interact with the screens by pressing buttons rather than reading the text. Because the interaction between person and paper isn’t as immediate, this prototype method generally slows the user down long enough to read the text. So if you want to test how users respond to UI copy, paper methods are most effective.
Before testing your prototype, consider cutting the paper so it’s small enough to fit in your hand like a phone. This technique will help people better conceptualize the product you’re testing. You can also make the experience more imaginative and collaborative by asking participants to draw directly on the paper prototype.
Testing paper prototypes is an effective way to encourage collaborative, imaginative responses from research participants.
Scrolls
Scrolls are a series of pages that participants and designers can flip through together, progressing through various screen interface concepts. This prototype method is especially effective in the early stages of product development, before the final design, because you can get feedback on multiple concepts that would otherwise be expensive to build in higher fidelity.
Before you create your scroll, you should first determine clear goals. What do you wish to learn from testing? For example, you might want to see whether your test participants can find a particular button or if the button function is obvious. Once you’ve determined what you’re after, try to think of your product steps from the user’s perspective. Then convert your task into a journey that you and your participants can work through together.
To create the scroll, print your product journey with one page for every step and add numbers to each page. Then tape the print-outs end-to-end in corresponding order. Now roll up the pages and you’ve created a single, long-panel scroll.
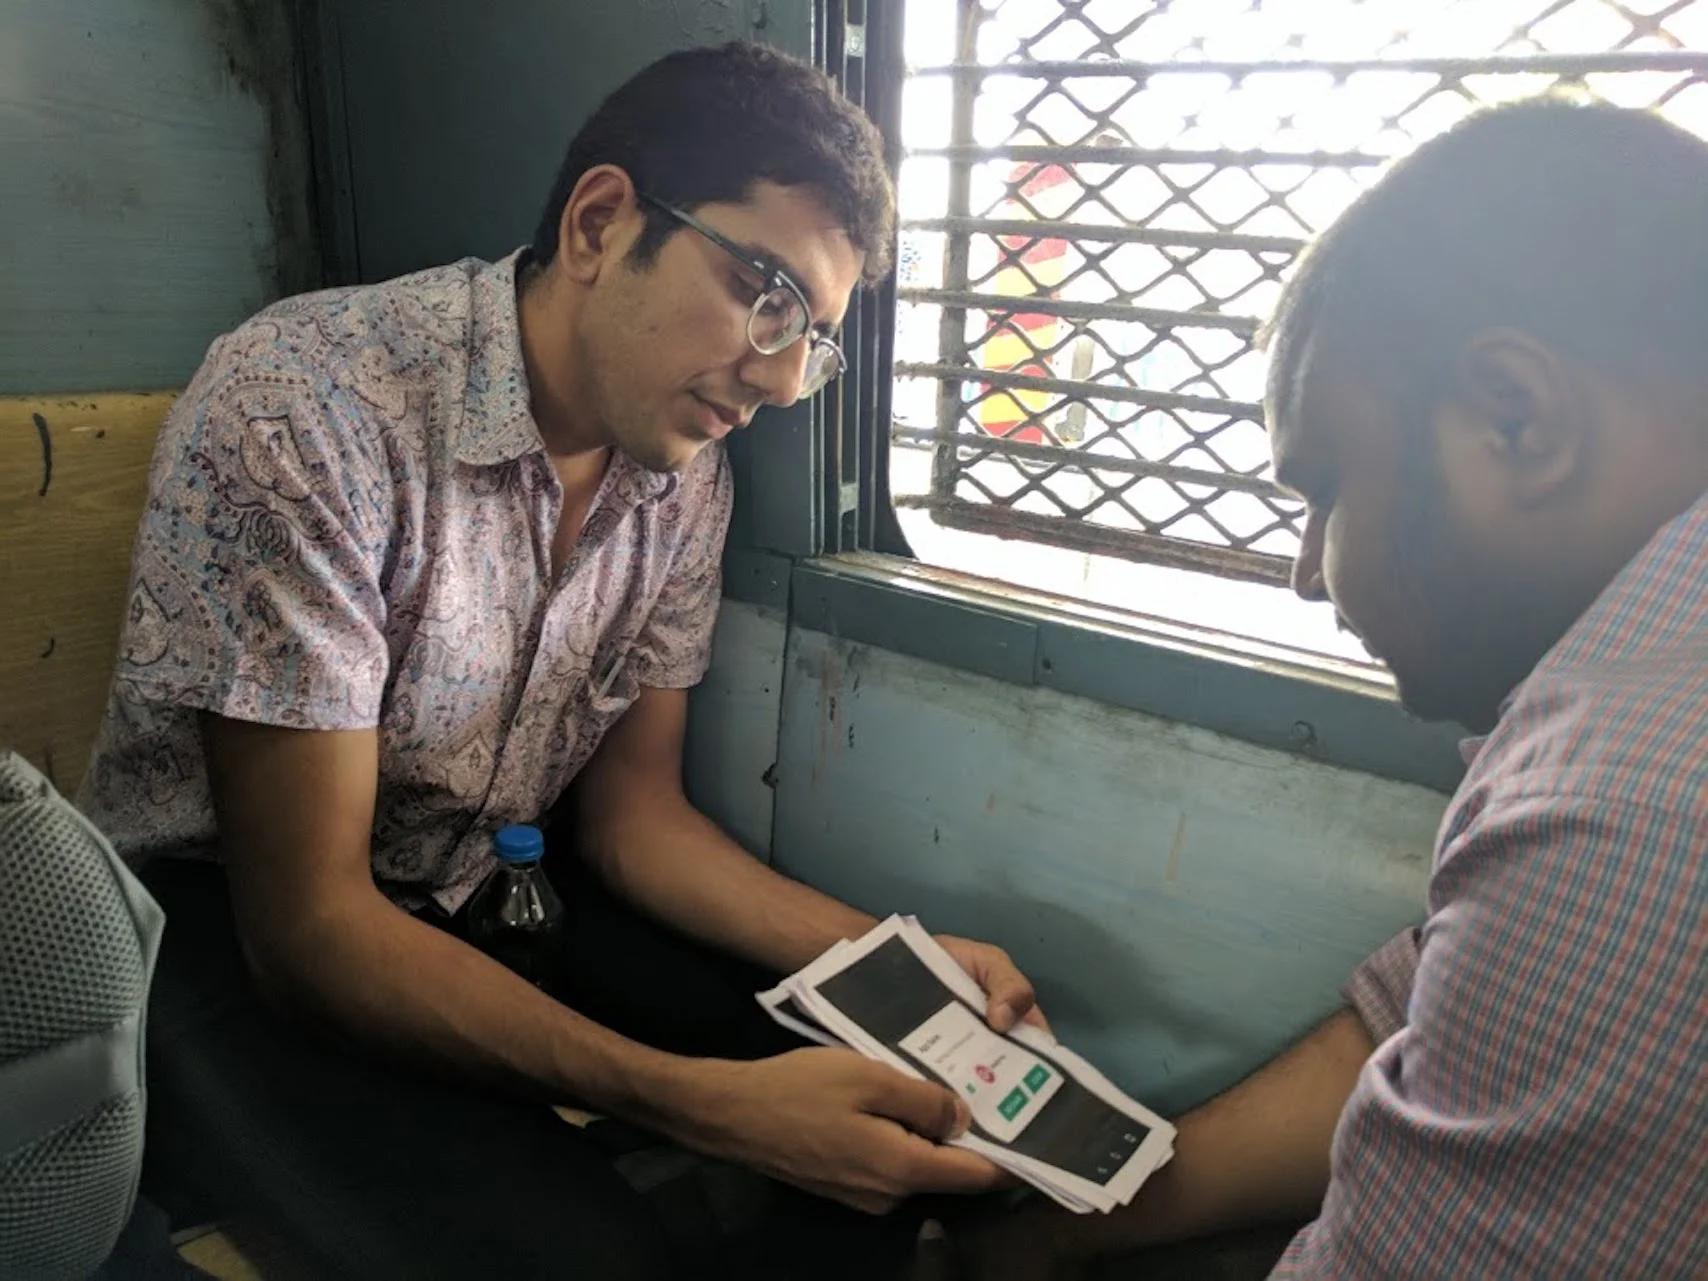
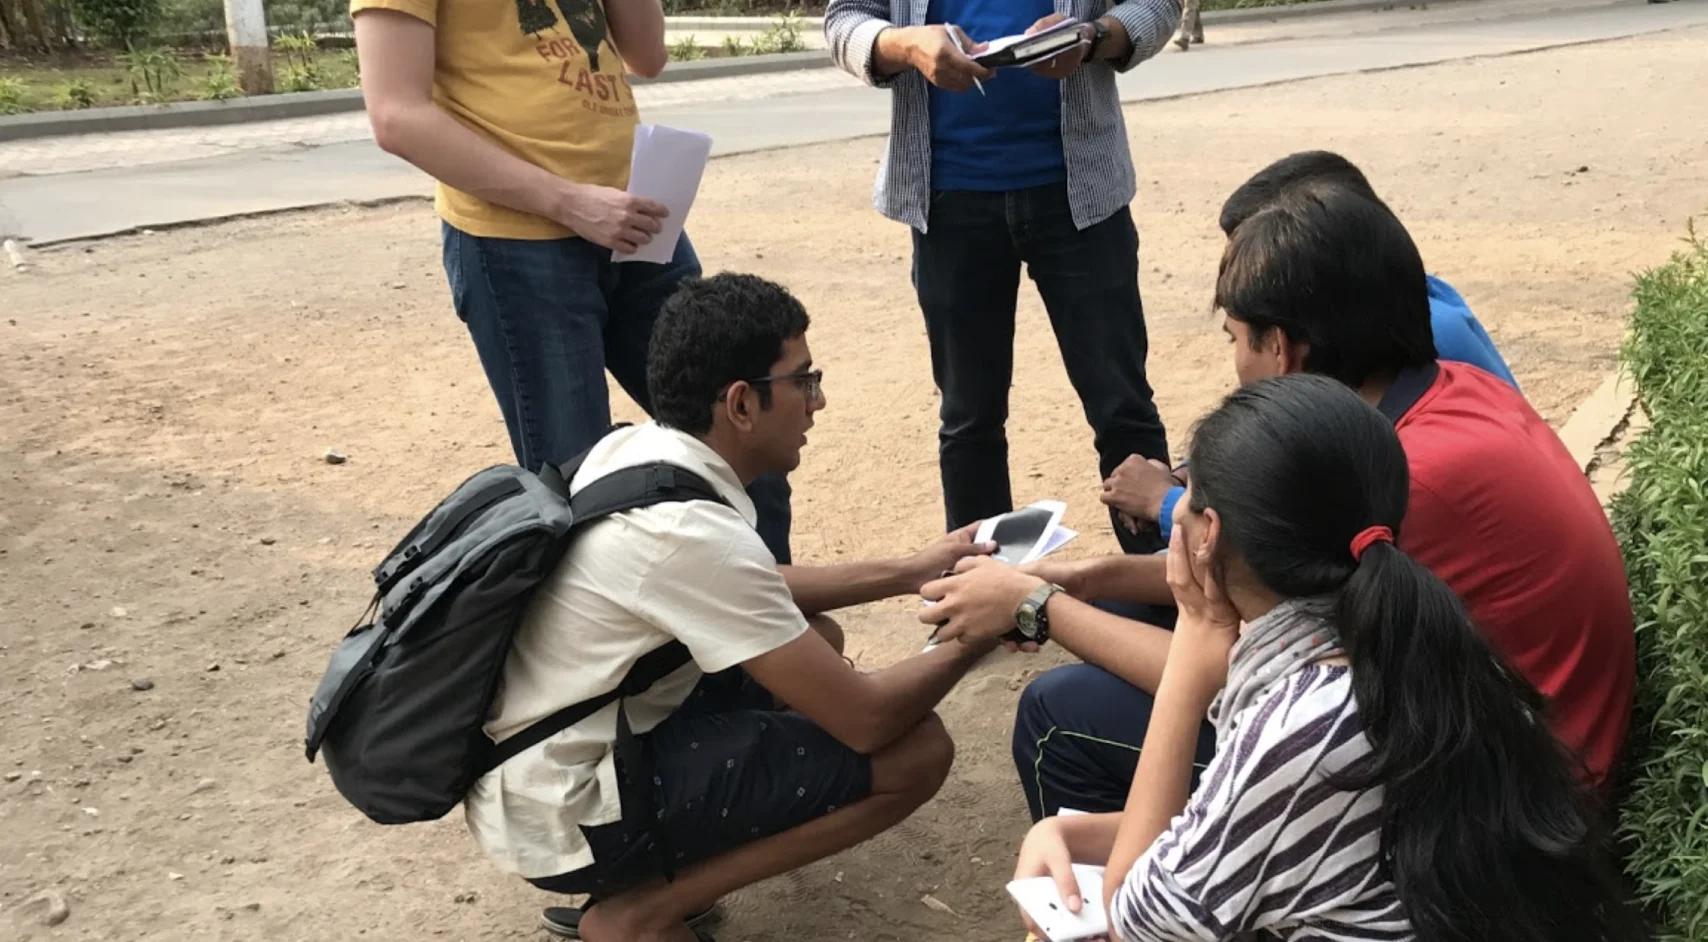
When testing, be sure to explain the scenario to the participant and let them control the pace by unrolling the scroll themselves. As the participant moves through the scroll, ask them to narrate what they think is happening on each page. If they seem confused, or pause for any reason during a test, ask questions and figure out the cause.
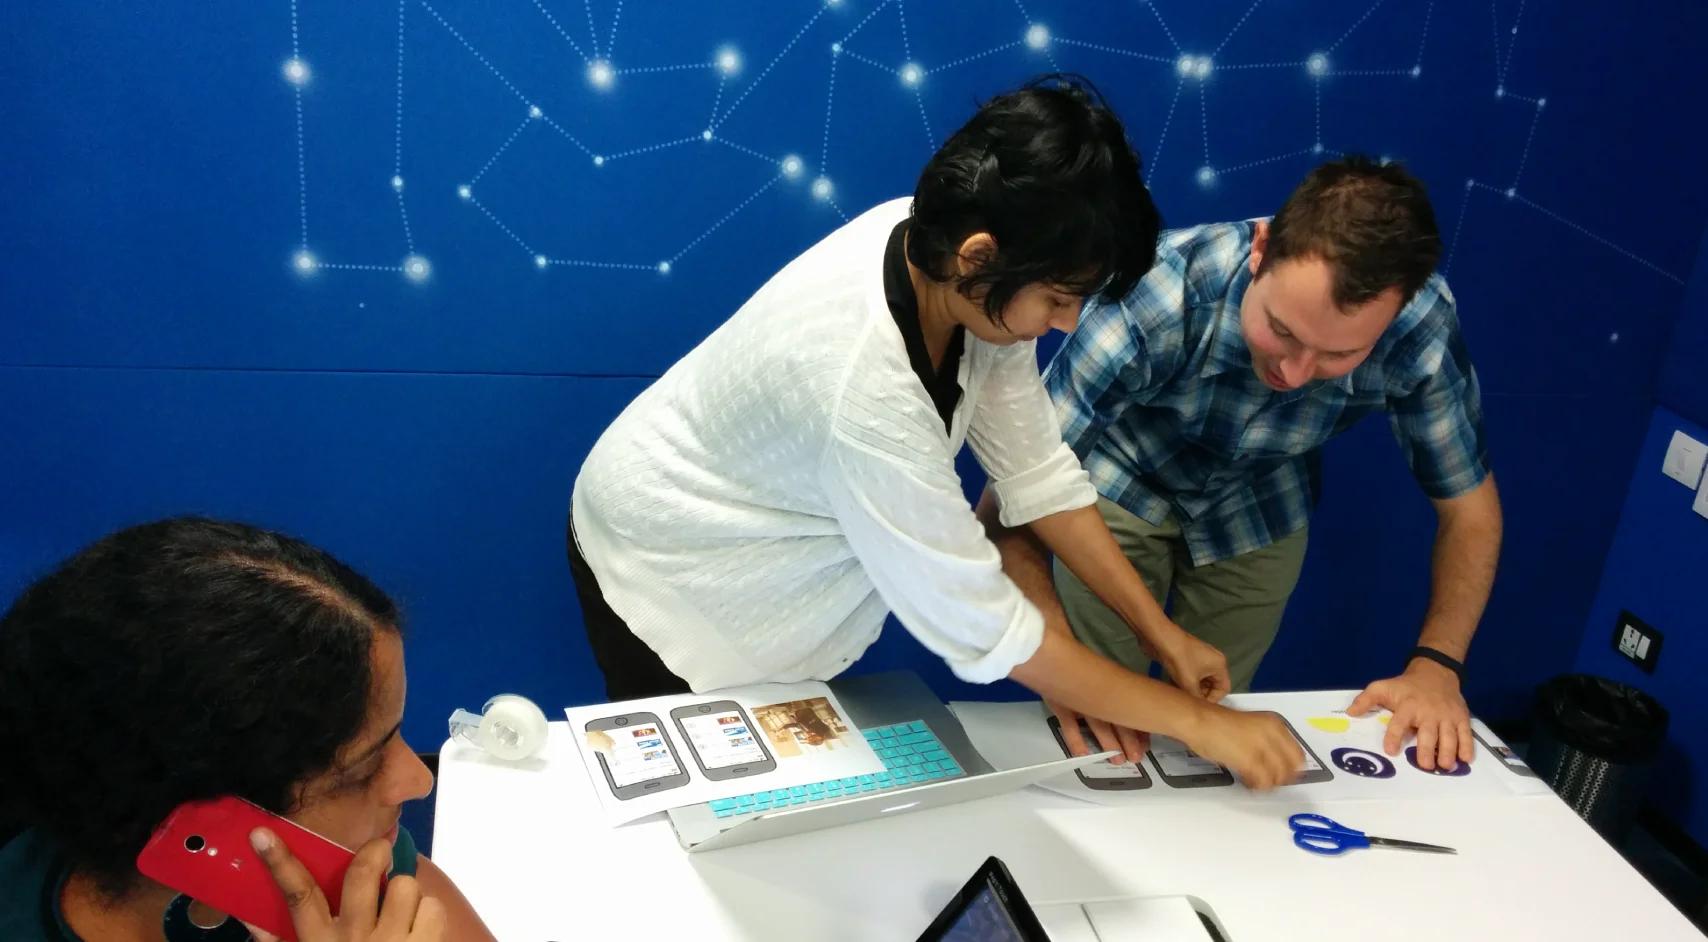
Google designers and researchers create a scroll paper prototype to test in the field.
Digital
When building global products, some designers opt for digital methods when the paper version becomes too abstract. And digital prototypes are typical when it’s time to test discoverability and navigation. For example, if a product team wants to understand how someone navigates through an application, digital prototypes can provide the answer. In contrast to paper prototypes, digital solutions represent applications in the way that participants are already accustomed to on their own mobile devices, and for new internet users, or those coming online for the first time, this option can be easier to parse. Digital colors and contrast are realistic, as compared to muted representations on paper. Participants also have more freedom to explore the digital prototype and can learn how to use the application by tapping the screen.
Most digital prototyping tools depend on the cloud for a full spectrum of features, so testing in places with intermittent connectivity or power requires extra preparation—though some tools offer limited offline functionality. Before you test a digital prototype in the field, save the prototype locally on your device and test it in airplane mode. At Google, we’ve used tools like Principal, Flinto, and Framer. These products range in fidelity from tappable to coded prototypes, and the right version depends on the goals of each study. It’s always a good idea to prepare paper prototypes as a backup, in case the digital version fails.
Before you test your digital prototype in the field, prepare a paper prototype as a backup in case you lose connectivity.
Swipe-through
The swipe-through method is a good way to test a digital prototype in a low-connectivity environment, and useful before the backend is fully built and an application is still in the wireframing stage. A collection of images or screenshots is downloaded onto a real phone, then the user swipes through each image, as if progressing through an application with each tap on the phone screen. When you can’t rely on an internet connection, downloading the images to a folder on local storage or an SD card allows you to conduct testing with limited connectivity. Best practice is to test prototypes on the type of phone or phones that people commonly use in the community where you’re testing.
| Low-fidelity | Pro | Con |
|---|---|---|
| Paper scrolls, wireframes | Low time investment; comfortable to users; encourages collaboration, offline friendly | Requires imagination and contextualizing; text-heavy |
| Medium-fidelity | Pro | Con |
| Swipe-through prototypes, Sketch or Illustrator mocks | Displays user journey; looks like final product; facilitates visual design feedback; offline friendly | Limited functionality; may require internet; may be OS-dependent; requires downloading to SD card or pre-loading |
| High-fidelity | Pro | Con |
| Custom platform | Personalized content; mimics real life experience; facilitates visual design feedback | Limited functionality; may require internet; may be OS-dependent; not offline friendly |
Dynamic, high-fidelity
Swipe-through prototypes and other low-fidelity tappable methods are effective for testing without dependence on bandwidth or power, but these methods can be confusing to testers because they lack the full functionality of an actual product. To help participants better understand your design, deliver an interactive, vibrant experience by incorporating motion.
In one study, designers tested a static digital interface depicting a stack of playing cards, where the intended action was swiping to reveal the next card. A majority of participants did not understand what to do. When the team introduced a high-fidelity prototype with motion that displayed full functionality, most participants immediately reacted by swiping the cards on the screen. In this instance, it was the static, tappable prototype that caused confusion rather than the interface design itself. By incorporating motion and responsive design, the application engaged participants. While high-fidelity prototypes take longer to build, they’re more delightful and memorable, and result in more detailed feedback. Because high-fidelity digital prototypes are expensive and time consuming to build, it may be difficult to produce and test a second iteration of a digital prototype.
Summary
Testing prototypes is a useful way to gather user input throughout the product development process. Effective prototype methods include paper prototypes (scrolls), low-fidelity digital prototypes (swipe-throughs), and dynamic digital prototypes that incorporate motion and sensory details. The right kind of prototype depends on the goals of the study, the audience, the design phase, and the product timeline.
Considering the three factors mentioned at the start—location, bandwidth, and community—can also help you determine which prototype method works best for your testing situation. While hard and fast rules don’t exist, incorporating these variables into prototyping conversations will help determine which version yields the most detailed feedback.
Thanks to the Google designers and researchers who contributed to this article: Garen Checkley, Phil Madeley, Aysha Siddique, and Peter Finlan. For additional articles on Google’s global methods,check out our full collection of guides.