Designing (and Learning From) a Teachable Machine
UX insights on designing simple, accessible interfaces for teaching computers
Machine learning increasingly affects our digital lives—from recommending music to translating foreign phrases and curating photo albums. It’s important for everyone using this technology to understand how it works, but doing so isn’t always easy. Machine learning is defined by its ability to “learn” from data without being explicitly programmed, and ML-driven products don’t typically let users peek behind the curtain to see why the system is making the decisions it does. Machine learning can help find your cat photos, but it won’t really tell you how it does so.
Last October, Google's Creative Lab released Teachable Machine, a free online experiment that lets you play with machine learning in your web browser, using your webcam as an input to train a machine learning model of your very own—no programming experience required. The team—a collaborative effort by Creative Lab and PAIR team members, plus friends from Støj and Use All Five—wanted people to get a feel for how machine learning actually “learns,” and to make the process itself more understandable.
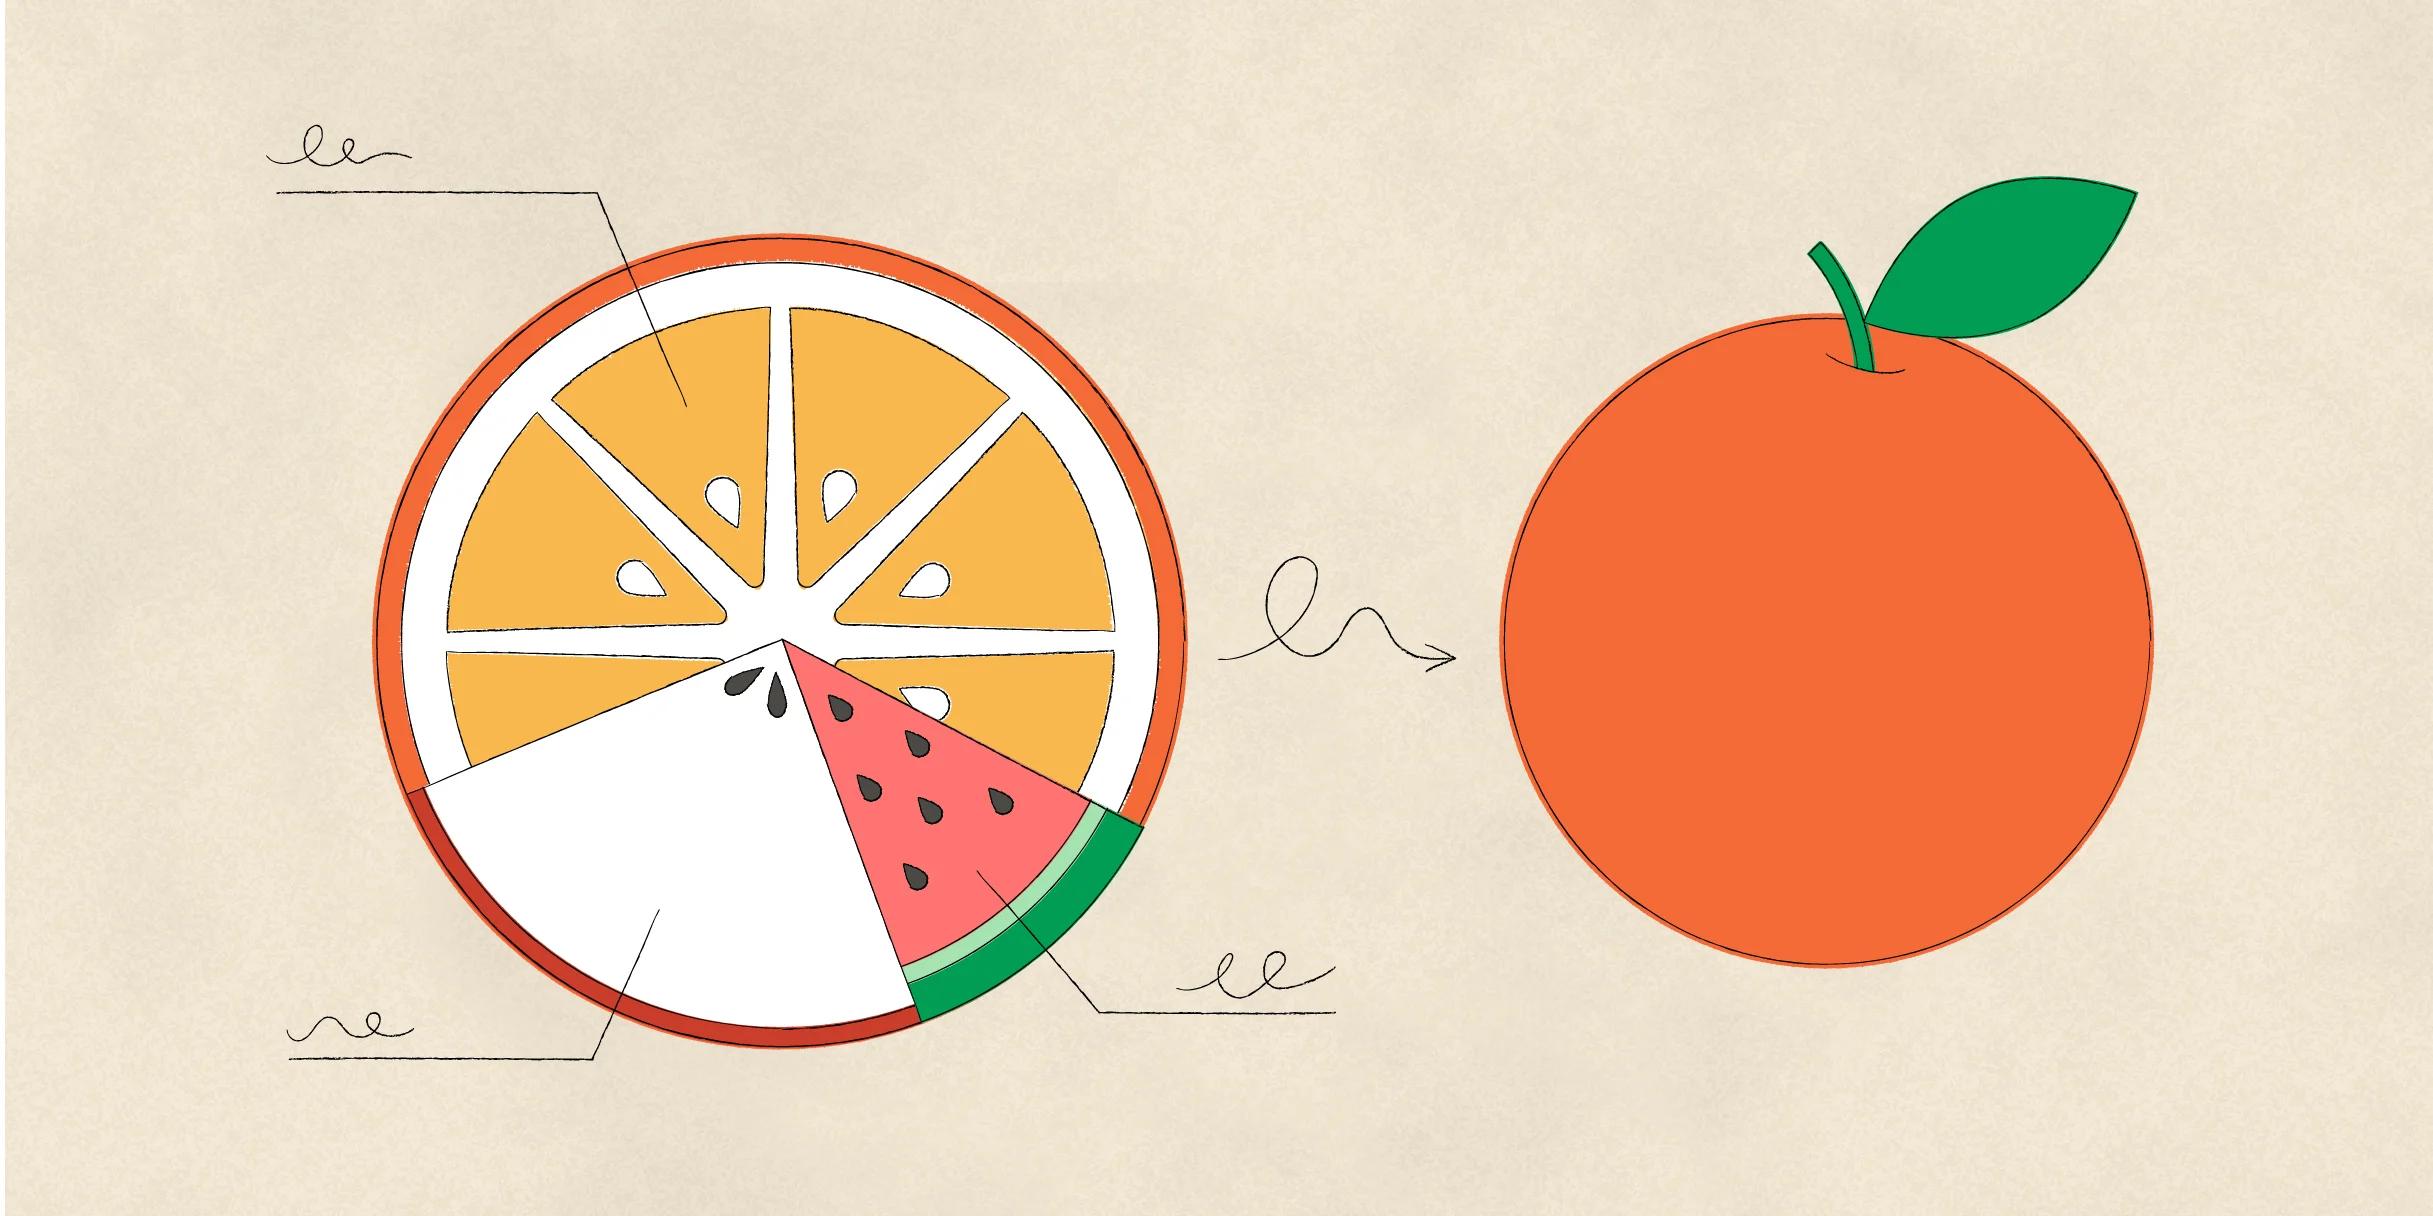
OK, but what are inputs? Or models? An input is just some piece of data—a picture, video, song, soundbite, or article—that you feed into a machine learning model in order to teach it. A model is a small computer program that learns from the information it’s given in order to evaluate other information. For example, a feature that recognizes faces in the photos stored on your phone, probably uses a model that was trained on inputs of many photos containing faces.
Let’s say you train a model by showing it a bunch of pictures of oranges (the inputs).
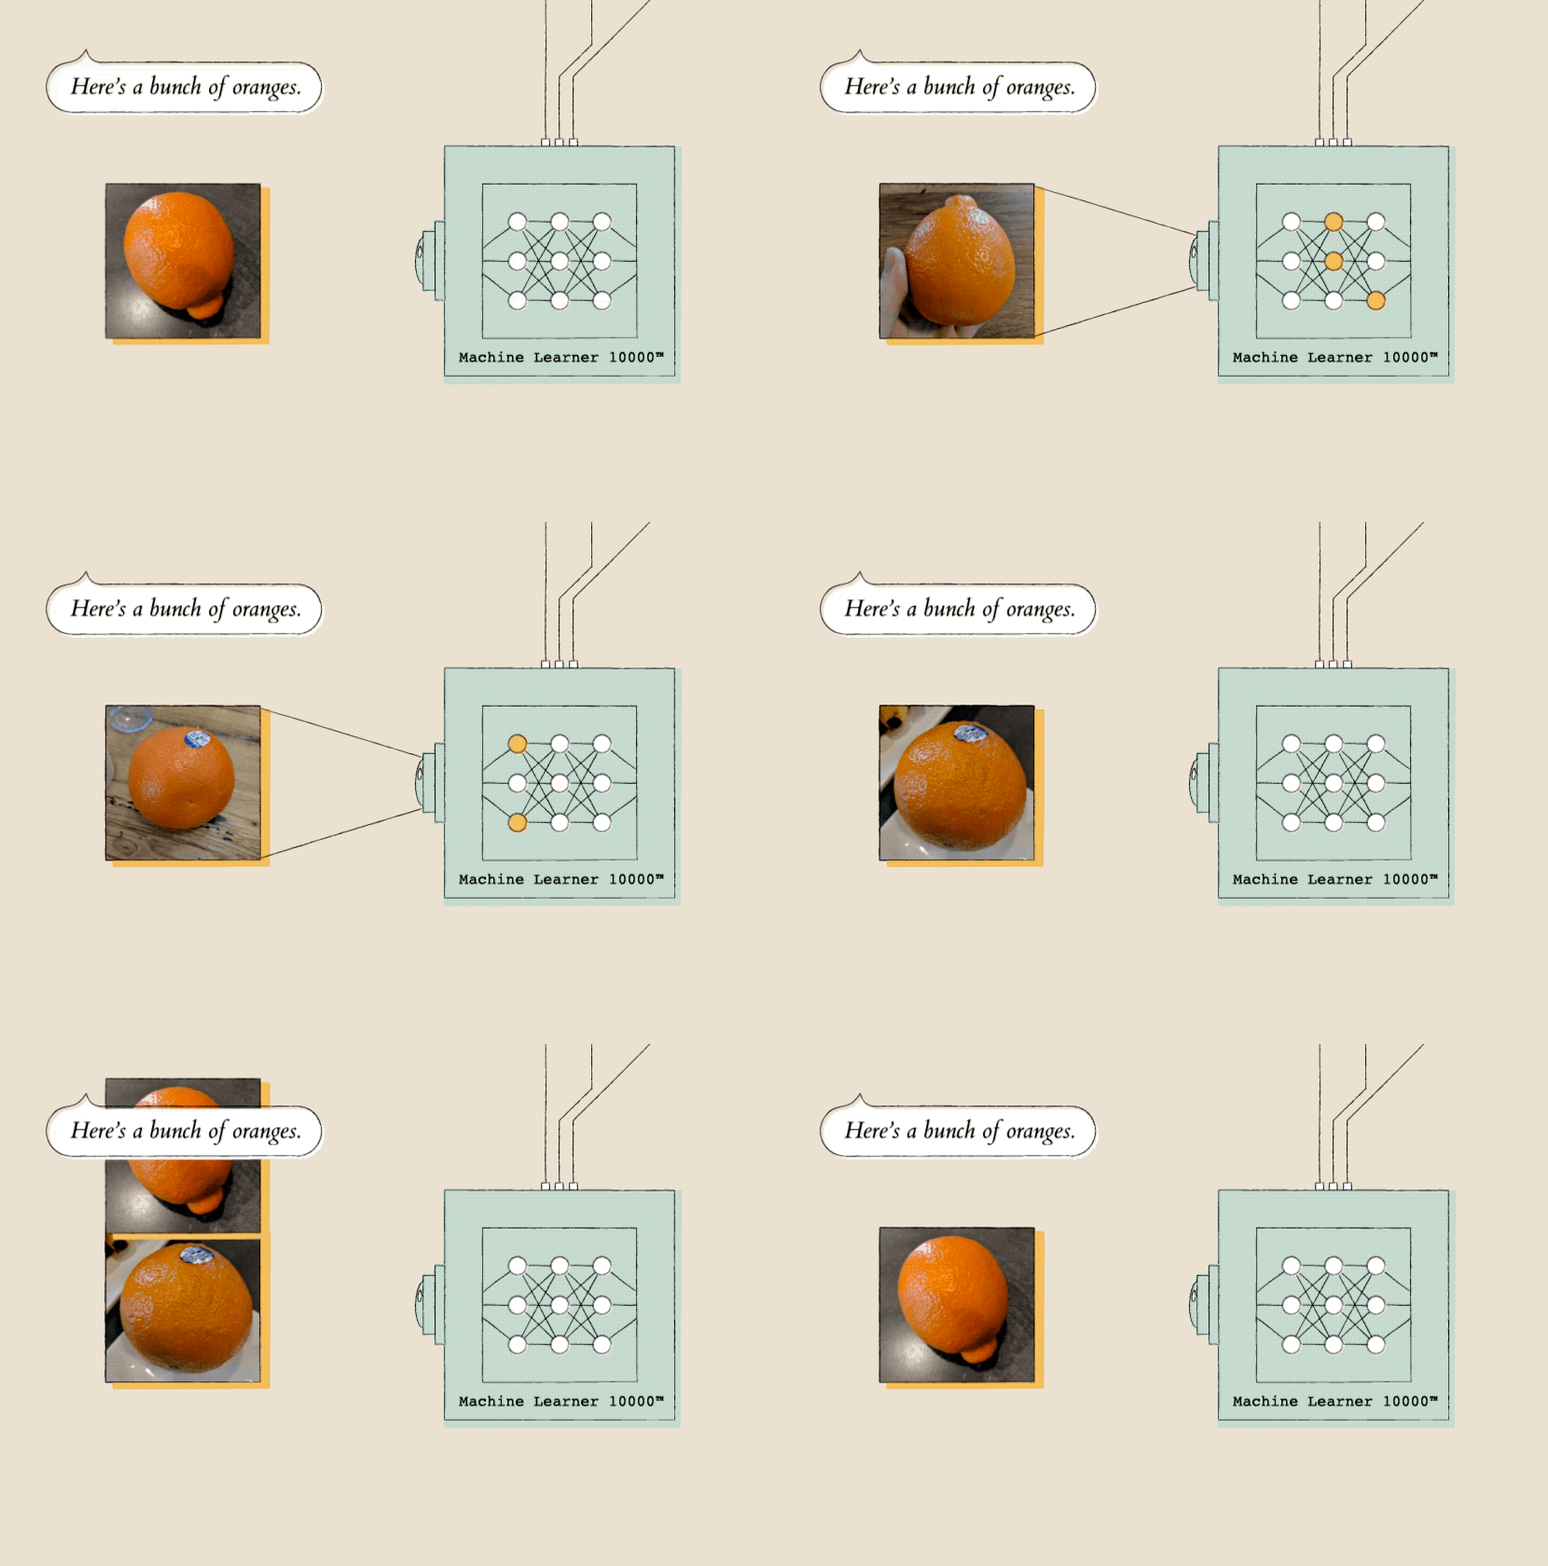
Teaching a model starts with showing it a lot of examples, so it can recognize patterns. Here, the model (Machine Learner 10000) is shown a lot of pictures of oranges so that it can start to recognize patterns in them.
Later, you could show that model a new picture (of say, a kiwi). It would use the pictures (of oranges) you showed it earlier to decide how likely it is that the new picture contains an orange.
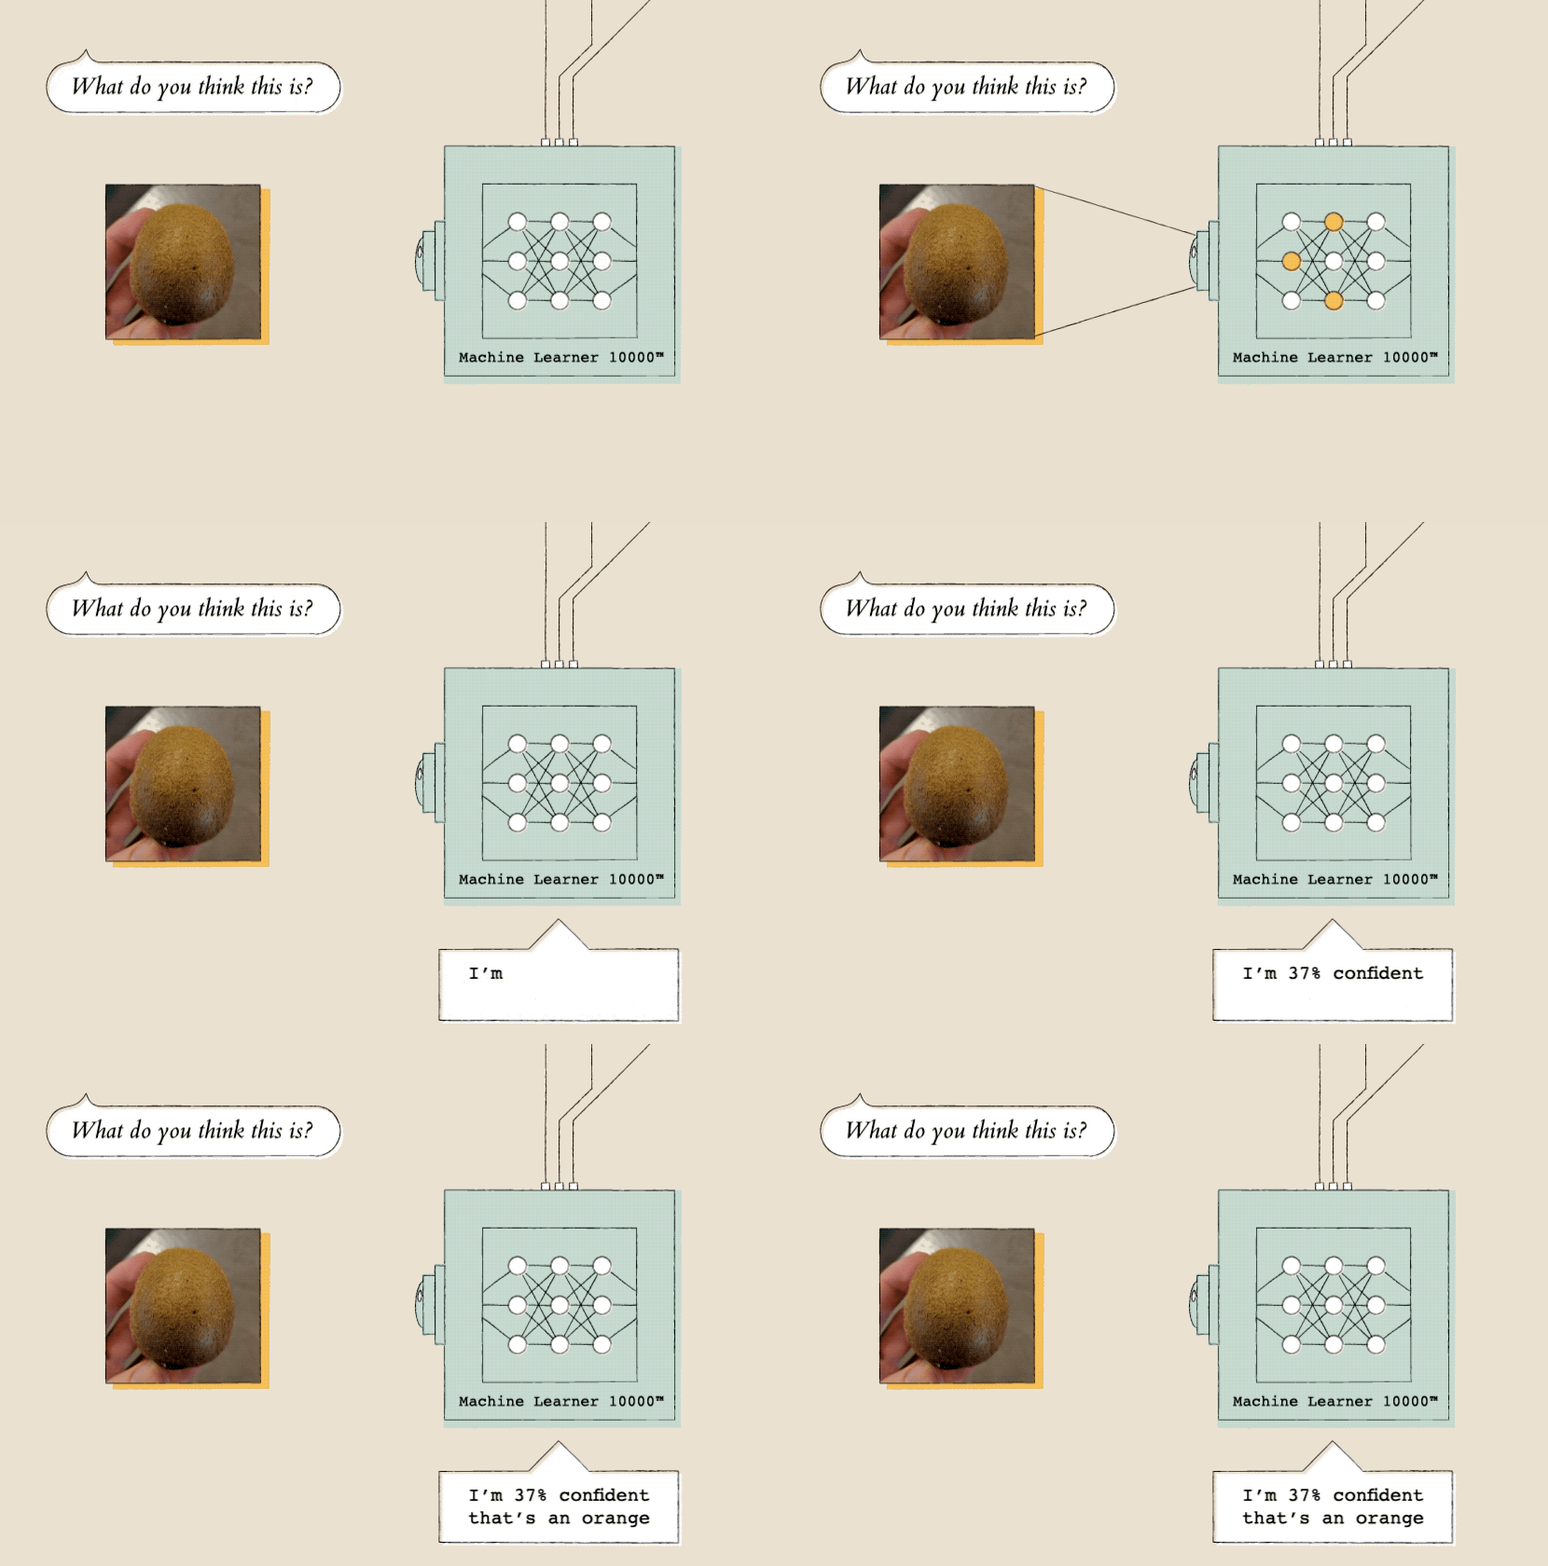
Once a model has learned from a lot of examples, it can evaluate new data. Here, the model evaluates a picture of a kiwi based on the orange photos it previously learned from.
You can also teach the model about different classes, or categories. In the case of fruit, you might have one class that’s really good at recognizing oranges, and another that’s good at recognizing apples (or kiwi).
With Teachable Machine, we set out to let people easily train their own ML models—and we hope to inspire more designers to build interfaces for experimenting with machine learning. Just as we were inspired by the lessons of many fun, accessible ML projects (like Rebecca Fiebrink’s Wekinator), we hope these lessons will help other designers get through the process quickly and easily.
Training ≠ output
Instead of training a model to do something very narrow (for example, recognize cats), we wanted Teachable Machine to feel as though you’re training a tool, like the keyboard on your computer or phone. The model you train could be used for any digital output. To emphasize the principle that input and output can be mixed and matched, we broke the interface into three different blocks.
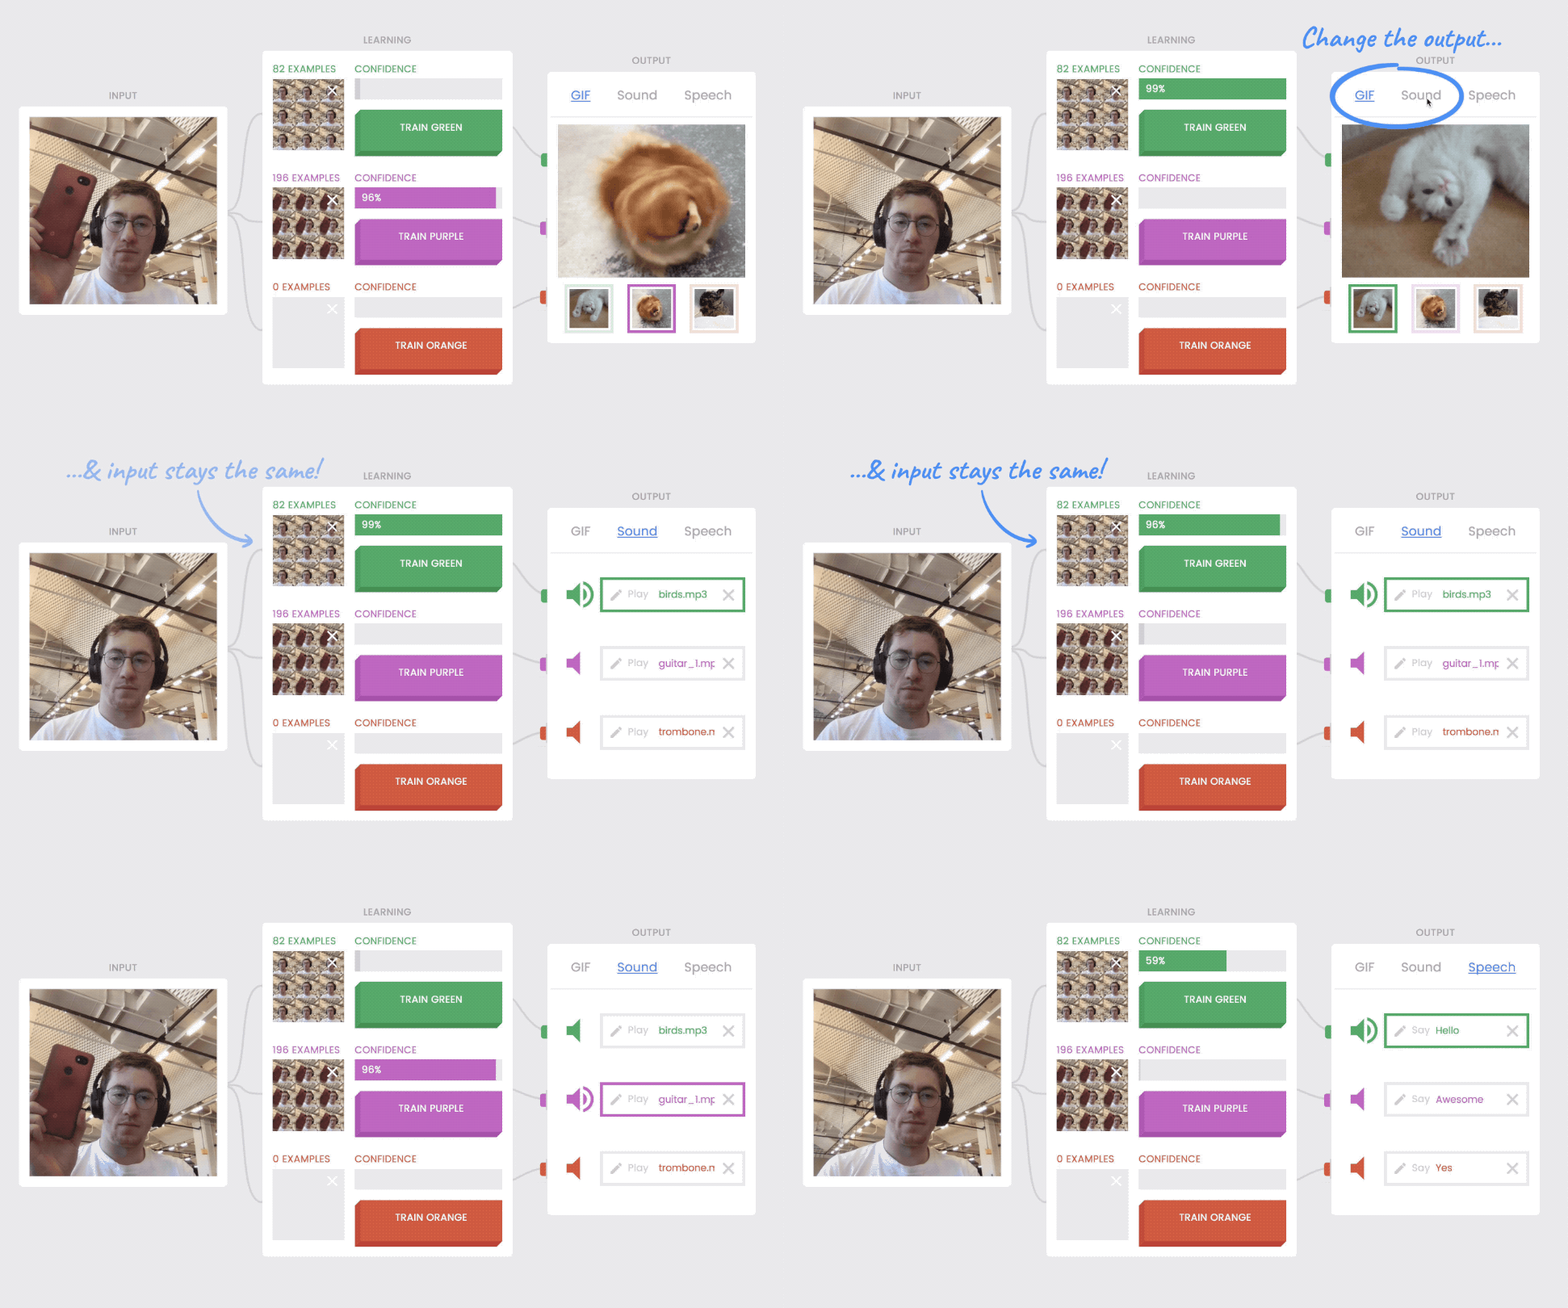
Because there are separate “blocks” for the input media, the learning interface, and the output media, the output can change and the input and learning blocks still operate.
The “input” block comes first. This is where digital media enters the system (pictured above, left). Then there’s the “learning” block (above, middle), where the model learns and interprets the input. The “output” box (above, right), is where the model’s interpretation does something like play a GIF or make a sound. Connections run between each block, just like the wires leading from your keyboard to your computer to your monitor. You can swap out your monitor for a new one, but your keyboard and computer will still work, right? The same principle holds true for the outputs in Teachable Machine—even when you switch them, the input and learning blocks still work.
This means that anyone can change the output of their model. After spending a few minutes on training, you can use it to show different GIFs and then switch to the speech output. The model works just as well.
Train by example, not by rule-making
Another principle core to the capabilities of machine learning: training the model by example, not by instruction. You teach the model by showing it a lot of examples—in our case, individual image frames. When it’s running, or “inferring,” your model looks at each new image frame, compares it to all the examples you’ve taught each class (or category) and returns a confidence rating—a measure of how confident it is that the new frame is similar to the classes you’ve trained before.
Our class model displays each class’ examples individually as they’re recorded. This also helps communicate an important distinction—that the model is not seeing motion, but just the still images it captures every few milliseconds.
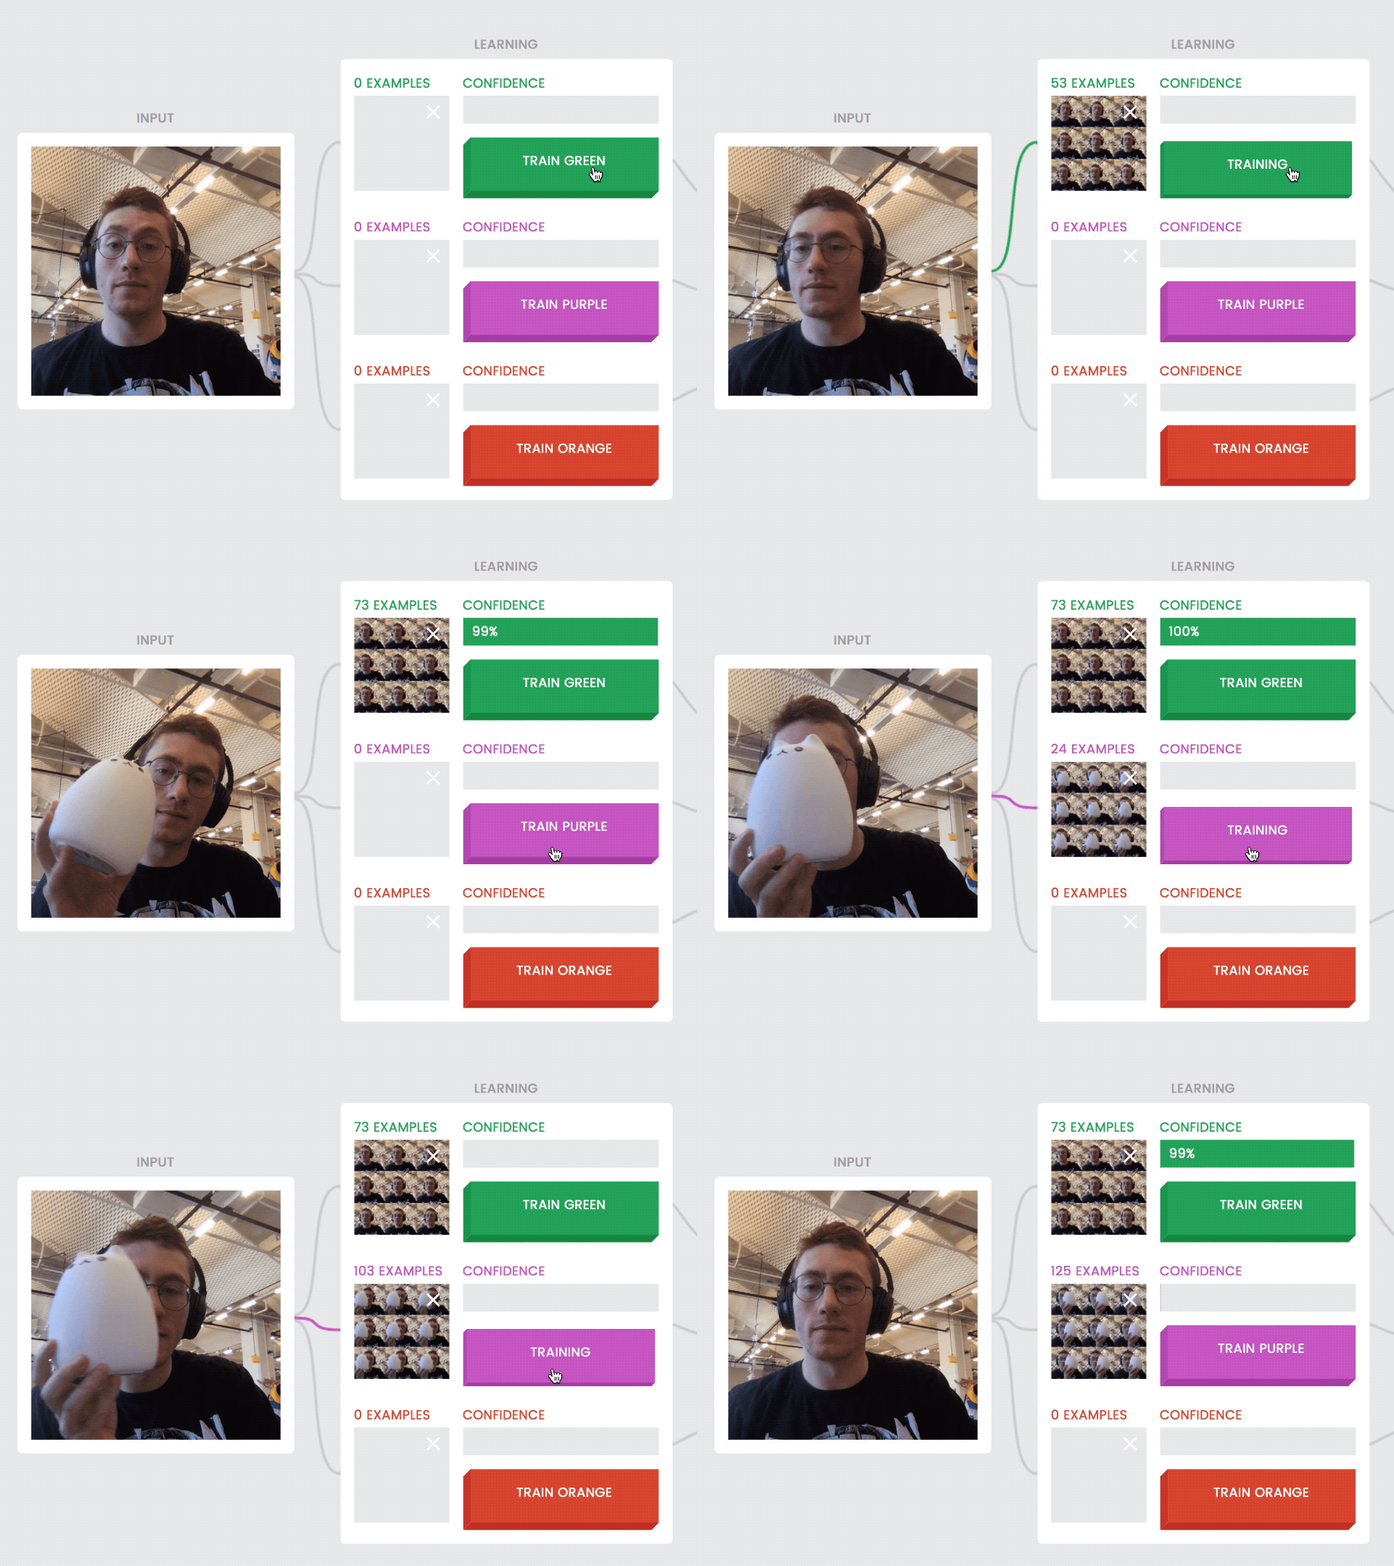
Give users visual feedback about the examples they’re training with. Here, the user sees image frames (photos without the toy cat) populate to the first class as it's taught, and then different image frames (photos with the toy cat) for the second class.
Models are soft!
A third principle is that machine learning models behave “softly.” We’re used to computers following very strict rules: if this, then that. If you press the shutter, the picture is taken. If you press delete, the character is removed. However, machine learning models don’t follow the same strict logic.
There are many scenarios when a model can be uncertain. To a computer, maybe a tennis ball and banana look really similar from a particular angle—just a bunch of yellow-ish pixels. Most products that employ machine learning today, try to hide this uncertainty from users, presenting results as certain and discrete. This can cause a lot of confusion if those results are incorrect. By honestly embracing the “softness” of machine learning, people can start to understand how algorithms make the mistakes that they do.
Teachable Machine visualizes the confidence of each class, so you can see for yourself what makes the model confident and what makes it uncertain. Each class operates on a spectrum, not a binary.
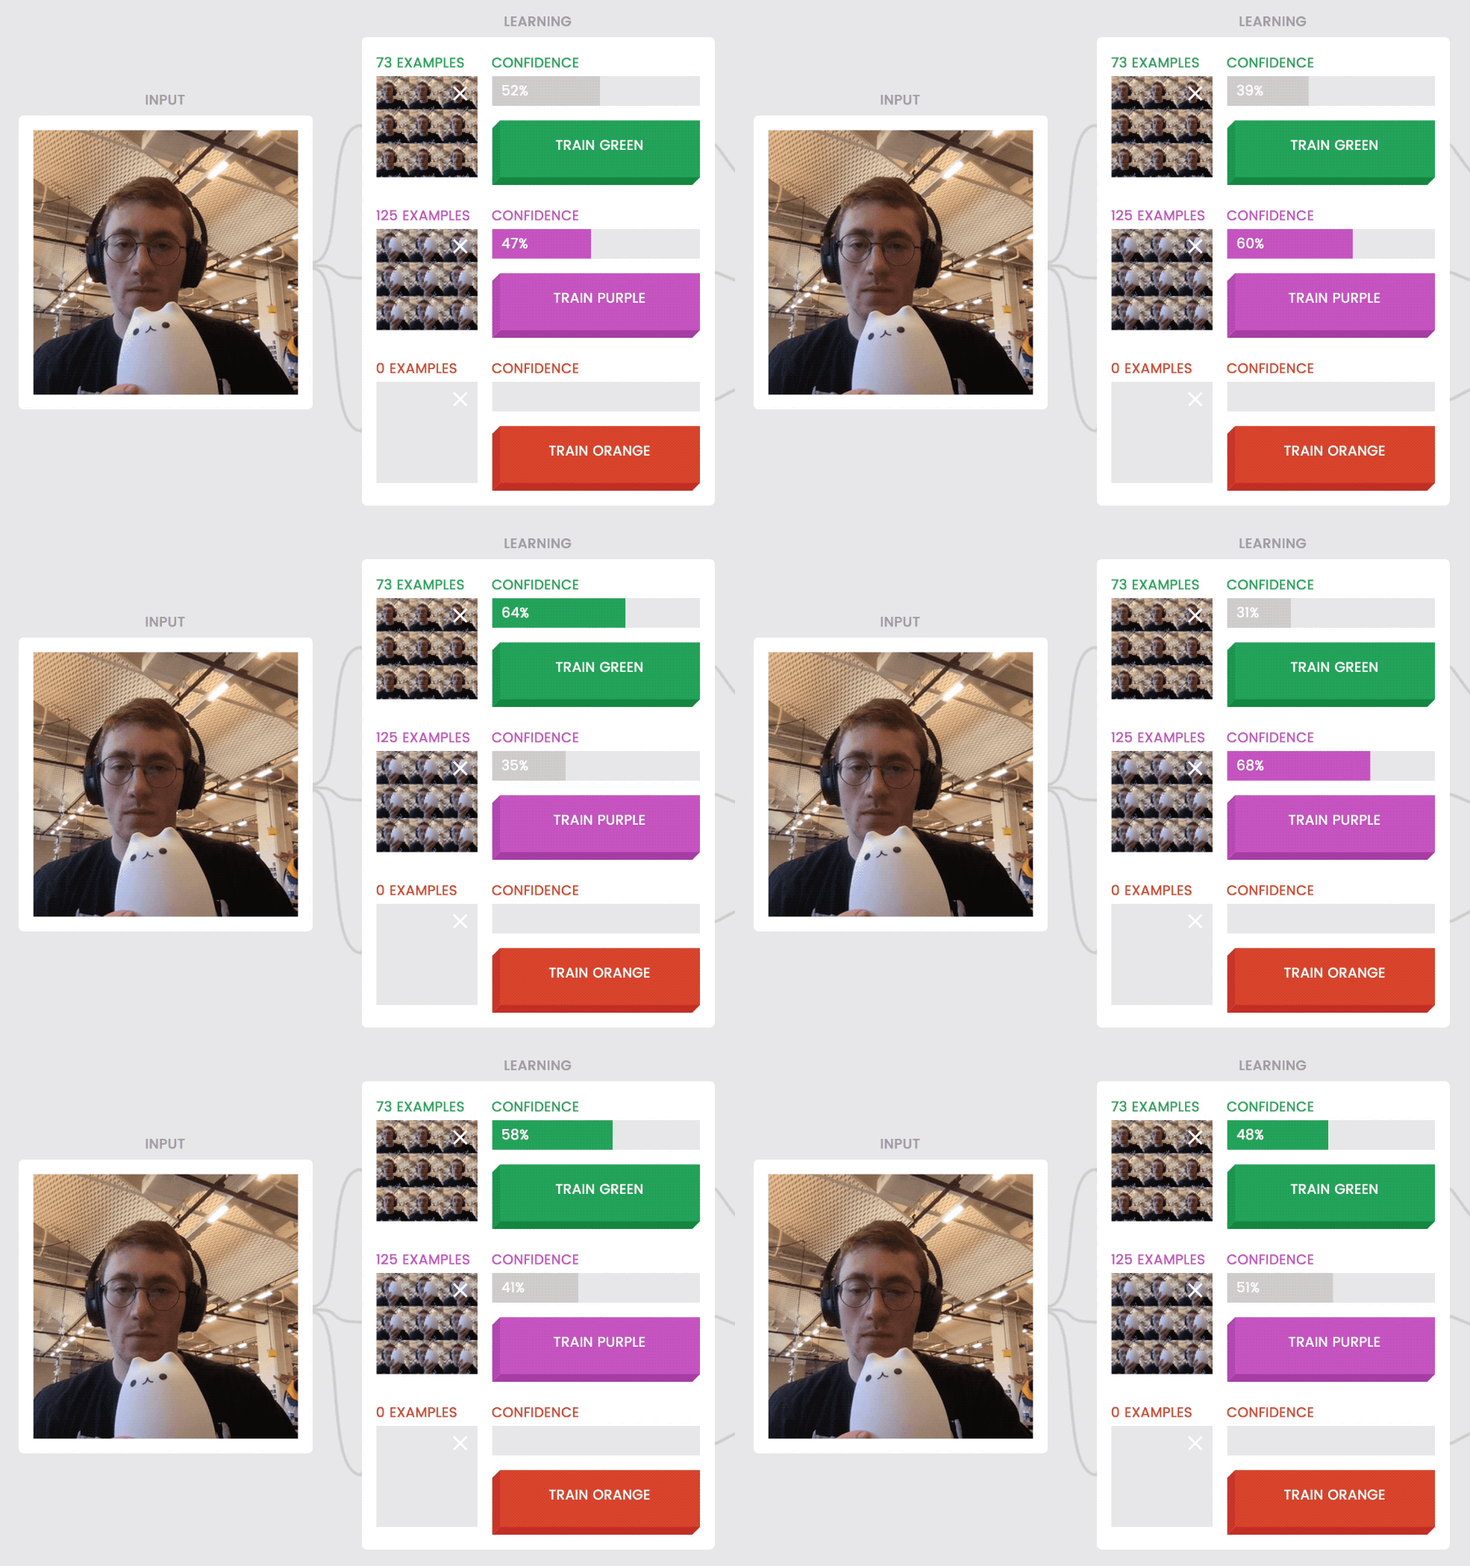
Models are sometimes uncertain about examples that don’t fit patterns they’ve seen before. For instance, holding the cat halfway out of the frame (above, left) when it was trained on examples that show the cat either fully in or fully out of the frame, is confusing to the model.
Debatable interactions
In addition to working towards the principles above, we wrestled with a few key decisions while prototyping.
Training versus inference
One big question was if “training” and “inference” should be separate interaction modes. Traditionally, the training of a machine learning model is done by teaching it with a large dataset of examples. You might train the model on a ton of pictures of oranges (as shown before) and switch to inference mode—asking the model to “infer,” or make a guess, about a new picture. You could show it a lemon, and see how confident it is that it’s similar to an orange.
Early in the design process, we considered displaying these two modes in the interface. The model would start in “training” mode and learn from the inputs before users switched it to “inference” mode to test the model.
While this clearly communicated what training and inference mean when creating a model, it took longer to get a model up and running. Plus, the words “training” and “inference”—while useful to know if you work in the field—aren’t crucial for someone just getting a feel for machine learning. The final version of Teachable Machine is always in “inference” mode unless it’s being actively trained. You can hold the button to train for a second, release it to see how the model is working, and then start training it again. This quick feedback loop, and the ability to get a model up and running fast, were higher priorities than explicitly delineating the two modes in the interface.
Thresholds versus gradients
We also debated about how to demonstrate the model’s effect on the output. Should an output be triggered by the confidence level reaching a certain threshold (say, play a GIF when the confidence of a class reaches 90%?) Or does it interpolate between different states based on the confidence of each class (e.g. shifting between red and blue so that if the model is 50% confident in both classes, it shows purple?) One could imagine an interface that interpolates between two different sounds based on how high your hand is, or one that just switches between the two sounds when your hand crosses the confidence barrier.
The outputs we found to be familiar and easy to get started with were discrete pieces of media—GIFs, sound bytes, and lines of text. Because switching between those pieces of media is clearer than blending between them, we ended up switching the outputs discretely. When the model switches which class has the highest confidence level, we switch to the output associated with that class.
Neutral class versus no neutral class
For many of the outputs we originally designed, having a “neutral” or “do-nothing” class made it easier to create games. For example, if you were playing Pong, you might want one class to make the paddle move up, one class to make it move down, and a “neutral” state where it does nothing. We considered having a dedicated “neutral” state in our interface that always acted as a “don’t do anything” catch-all class.
Having a dedicated neutral state might help you build a mental model for how to control a specific game, but it’s not quite an honest representation of how the model works. The model doesn’t care which class is neutral—from its perspective, “neutral” is a class just like any other, just with a different name and design on the surface. We didn’t want people thinking that a “neutral” state was intrinsically part of training an ML model. To that end, we eliminated some outputs that were frustrating or confusing without a neutral state. Our final outputs, gifs, sound, and text, work just by switching the output when you switch classes—no need for a neutral state. Just an honest one.
Design your own teachable experience
The more accessible machine learning becomes, the more we hope people will be able to easily train their own custom models on all sorts of data, from all kinds of sensors. If you’re interested in designing your own teachable experience, you can start by using our Teachable Machine boilerplate, which provides simple access to the underlying technology we used to build Teachable Machine. Good luck!
Barron Webster is a New York City-based designer in Google’s Creative Lab. He works across a range of design disciplines to bring access and understanding of useful technology to as many people as possible.
For more on how to take a human-centered approach to designing with ML and AI, visit our collection**of practical insights from Google's People AI + Research team.